Faxing Documents
In Touch EMR allows user to fax documents without any limit.
From the Patient Dashboard under the Documents section, you will see the fax icon next to any document. (Completed documents, Plan of Care, Flowsheet and Miscellaneous note)
Once the fax icon is clicked, the Send Fax Page will appear:
- Select Recipient - 3 options for selecting a recipient
- Referral Source - If there is any referral provider associated on the patient chart, it will automatically populate as the recipient once the referral source button is selected. But if the intended recipient is not the default referral resource, the user can type the name of the referral resource and the system will search for a match in the Referral Resource list. To review on how to associate the referring provider to the patient chart, click here. To review how to add Referral Resources to the Referral Resource list, click here.
- There is an option to Assign Multiple Referral Sources if there is a need to send the fax to multiple recipients. You can choose as many providers as you wish. The pop up will show the list of Referral Resources you have on your clinic. To choose one, click on the chosen resource and then click on the blue arrow button pointing to the right. The Referral Resource will be added to the list on the right. This is the list of recipients.
Once you click the button Assign button, it will list out the selected recipients on the right side.
- There is an option to Assign Multiple Referral Sources if there is a need to send the fax to multiple recipients. You can choose as many providers as you wish. The pop up will show the list of Referral Resources you have on your clinic. To choose one, click on the chosen resource and then click on the blue arrow button pointing to the right. The Referral Resource will be added to the list on the right. This is the list of recipients.
- Connections - The users has the ability to choose from the connections list who they wish to send the fax to. To review the lesson on how to add contacts to your connections list, click here.
- Others - The users also has the ability to just type the name and fax number of anyone that they wish to send the fax to.
- Referral Source - If there is any referral provider associated on the patient chart, it will automatically populate as the recipient once the referral source button is selected. But if the intended recipient is not the default referral resource, the user can type the name of the referral resource and the system will search for a match in the Referral Resource list. To review on how to associate the referring provider to the patient chart, click here. To review how to add Referral Resources to the Referral Resource list, click here.
- Sender number - This is the clinic's number.
- Select the Sender Name - Once clicked, this will provide a drop-down list of all the clinic locations that will appear as the sender. To review the lesson on how to add clinic locations, click here
- Select multiple documents - The user can select other completed documents to be faxed along with the current document selected.
- Select uploaded files - The user can select any uploaded files within the patient chart to be faxed along with the current document selected.
- Select plan of care - The user can select any Plan of Care within the patient chart to be faxed along with the current document selected.
- Select flowsheet - The user can select any Flowsheet within the patient chart to be faxed along with the current document selected.
- Select flowsheet preview - The user can select any Flowsheet Preview within the patient chart to be faxed along with the current document selected.
- Select miscellaneous note - The user can select any miscellaneous within the patient chart to be faxed along with the current document selected.
- Cover Sheet - The user has the ability to add a note when YES option is chosen. This will open a new text box that will allow the user to enter the message for the cover sheet.
Fax Status
Once you have sent out the fax, the screen will automatically go back to the Patient Dashboard.
Right beside the document that you have faxed, you will new icons.
- Check or X - This will determine the status of the fax whether it was successful or not. The Green check mark means that it is successful. The Red X mark means it is not successful. There are several factors as to why the fax is not successful, it could be that the line is busy or the fax number is invalid.
- Cover Letter icon - Once clicked, this icon will show you what was the contents of the cover letter during the time that the fax was made
- Date and Time - This indicates the date and time that the fax was sent out.
Fax Center
You will have the ability to also fax documents from your computer through the In Touch EMR system.
From the Add Ons Tab on the left, click the Fax Center and under Send fax you will be able to send documents from your computer.
Click on the Choose button under Select file and choose the document from your computer. Acceptable upload file formats include jpg, jpeg, png, gif, PDF, doc, docx, xls, xlsx and csv. File size limit is 5 MB.
Just like sending fax through the patient dashboard, you will be able to choose your recipients from your Referral Resource list or Connections.
Fax Reporting
In Touch EMR provides a report of all the faxes that were sent out.
From the Add Ons Tab on the left, click the Fax Center and under the Fax Reporting Tab, you will be able to generate reports.
You can filter the list based on
- Date
- Receiver name
- User - the user that sent the fax
- Document Type
- Patient Name
This page will show the following information
- Receiver Name
- Time sent
- Document Name
- Document Type
- Status
- User that sent the fax
- Patient Name
Refax Option
The refax option is a quick method to resend faxes that have failed transmission for any reason (ie. incorrect fax numbers, interrupted transmissions, internet was cut off, etc). It is available in the fax center under fax reporting.
This is an example of a document that was fax but was not successful from the Patient Dashboard.
From the Fax Center you will be able to see the status of the fax. For Failed faxes, it will show a fax icon.
Once you click the fax icon, you will be redirected to the send fax screen. Through the refax option, it automatically selects the same file you tried to send (if this comes with a cover sheet, the cover sheet is automatically associated to the document).
NOTE: You do not have to manually select file. If you select a different file, this file will override the original document you plan to send out.
If you wish to make changes to details, you still can edit prior to clicking send fax. Review the recipient number. For failed transmission due to incorrect recipient fax number, you can edit this field. Through refax, the recipient information is automatically pre-populated.
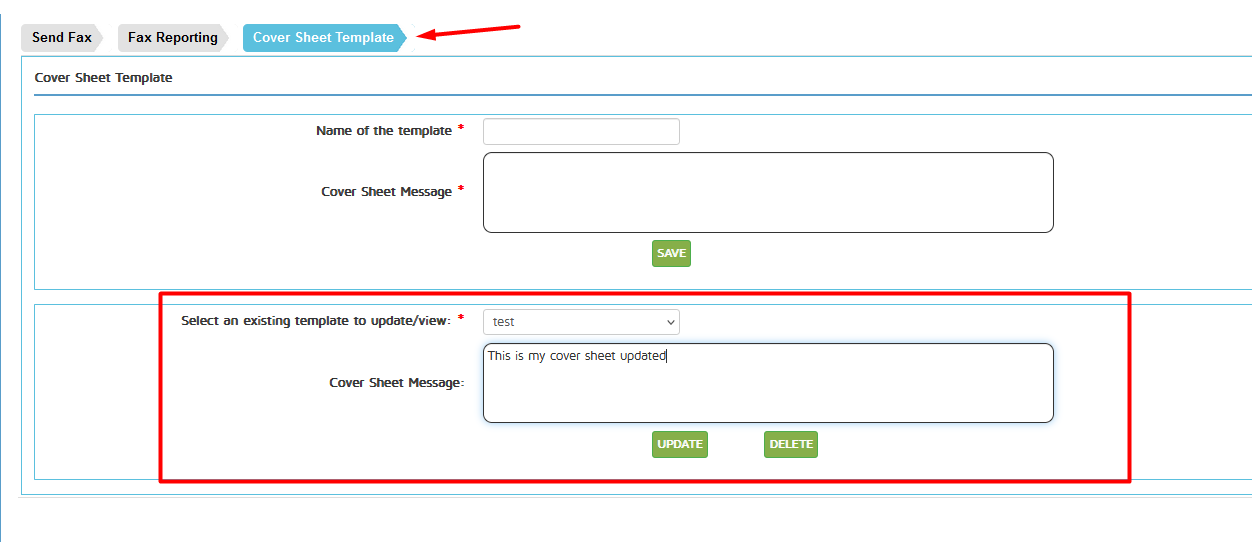
Cover Sheet Template
This feature gives you a drop-down list of your own custom templates that you can use for your faxes.

To create your custom templates, go to the Cover Sheet Template tab. Input the Name of the Template and the message of the template then click on Save.
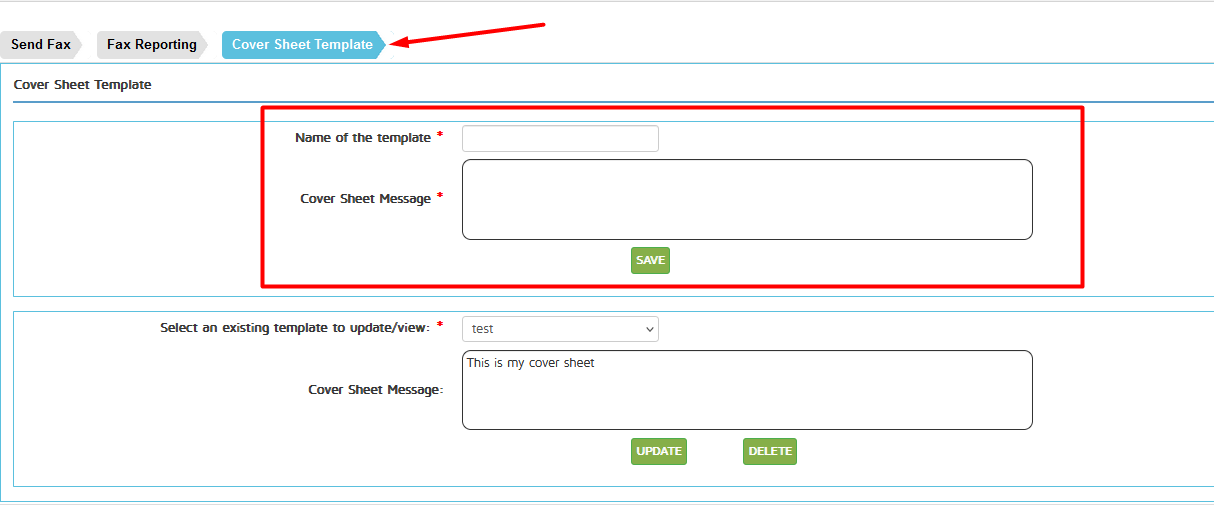
Editing your templates is also under the Cover Sheet Template tab. Select your existing templates, edit the message then click on Update.