There are several components in the Plan of Care section which will be discussed in this lesson
- Medical Necessity
- Codes
- Types of Services to be Provided
- Goals
- Instruction/Intervention
- Physician Options
- Provider Options
Minimum plan of care requirements for Medicare patients includes documentation of a primary (physician) diagnosis and therapy (encounter) diagnosis, description of procedures and modalities, amount frequency and duration of services and date and signature of the rendering clinician generating the plan of care.
Documentation of verbal or written approval is required by a physician or a non-physician practitioner if the therapist must significantly alter or change a previously established plan of care. Significant changes in long term goals take place in the event of a new condition to be treated, or a significant change in the patient’s condition.
The plan of care should contain functional goals that will improve the patient’s ability to function at home and in society. These goals should be achieved as a direct result of skilled therapy services. All goals should be stated in specific, measurable, achievable, realistic, and timely terms with an anticipated date of achievement. All goals should start with the end in mind. The objective is to restore the prior level of function for the patient by treating the impairments that limit function. All goals should focus on the patient and at times, on caregivers. All goals should designate specific skilled therapy components used to treat a specific impairment and improve function as a direct outcome of the achievement of the goal.
The achievement of this goal should improve the patient’s quality of life.
Medical Necessity
This is the area for the physician script. When the referring provider ordered physical therapy treatment, they will provide the information that will need to be entered in the Medical Necessity. Users must fill out the following
- Is the treatment plan related to the functional outcome expected? - a yes or no option is provided
- Frequency - a drop-down list of option is provided. The users can click on any of the options to select their response
- Duration - a drop-down list of option is provided. The users can click on any of the options to select their response
- Certification Period - From - This area is already automatically populated once the user had chosen a Frequency and Duration. The certification period will start from the date of when this document has been created to the end of the duration indicated. But if the user wishes to indicate their own dates, click on the box and it will show a calendar. The user can pick a certain date from the calendar.
Information entered in the medical necessity helps the system to countdown the remaining physician script /physician certification. To learn more about how the system will alert users regarding physician certification and how to set up this alert, click here.
Codes
Information that appears in the code area is not editable from the Plan of Care. This is for reference details only. If users would like to make changes to this section, changes must be made on the section where the code was entered.
- Treatment Diagnosis Code - this is the ICD 10 code and description as selected from the Subjective tab.
- Functional Limitation G Codes - this is the code FLG codes and modifier as selected from the Objective tab
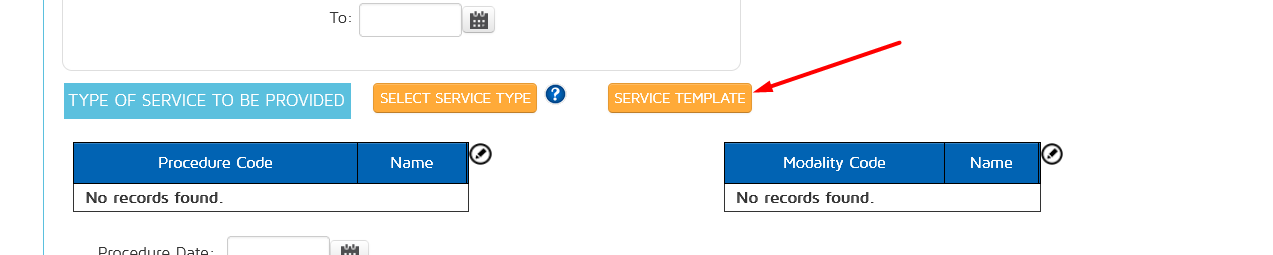
Types of Services to be Provided
This section is for the clinician to enter all the upcoming procedures/ modalities to be performed on the succeeding visits.
To add a procedure/modality, click on the select service type and choose one to add.
Depending on what was selected, it will either be on the procedure column or modalities column of the documentation.
If you wish to delete a selected procedure/ modality, right click and choose delete.
We did not include all CPT codes on the list of option to choose from in the pop-up to avoid confusion with having too many options. We only added the most commonly used procedures and modalities.
If your procedures or modalities are not available on the pop-up selection options, you will need to add it on the type of service. Go to the main left tab options under Administration and choose Types of service (plan)
Click on the Add More Services button
A pop-up box will appear. It will have all the possible CPT codes that correspond to different procedures and modalities. You can search either by CPT code, description or Category.
Choose whether it will be added to your procedures or modalities section. Click on the Add option to select.
It will be added to your list of available services to be provided. This list is what appears in the pop-up box on the plan of care when selecting the Types of services to be provided for future visits. If you want to delete some information in the list, click on the icon.
Some options cannot be deleted. Those are the ones provided by In Touch EMR as the permanent options.
Procedures and Modalities Templates
You can now add multiple procedures and modalities in one click of a button using templates.
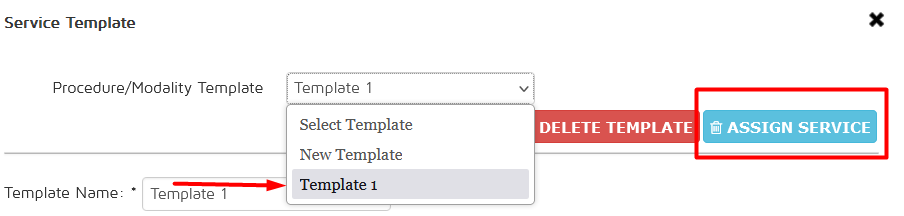
To create and use a template, click on Service Template.
From the drop down menu, select New Template.

Key in the template name, select the service type you want to add then click Add for the designated procedure/modality.
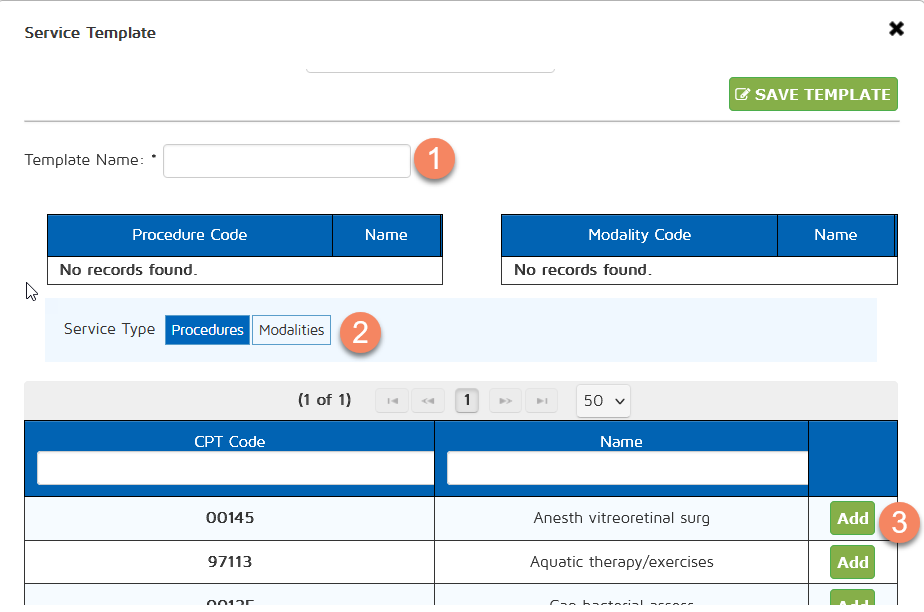
Once done adding the procedures and modalities, click on Save Template.
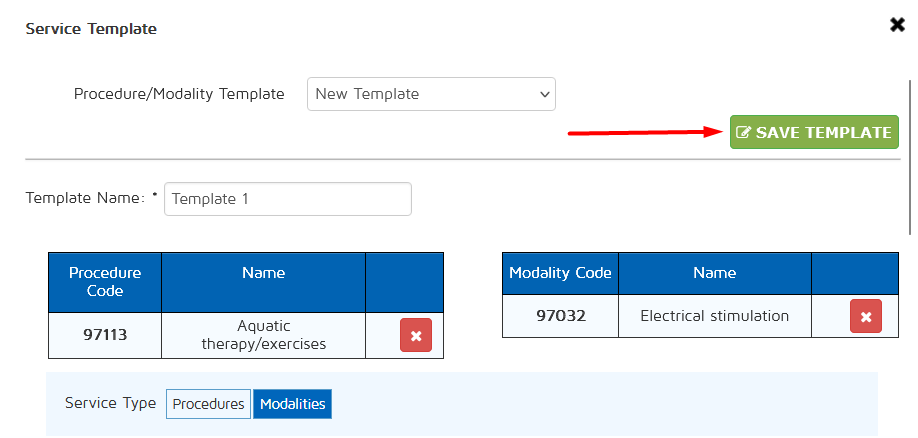
From the same drop down menu, select the created template and click on Assign Service to apply the procedures and modalities from that template.
Goals
The most important component of the Plan of Care. There are 2 ways that Goals can be added to the Plan of Care.
- From the Plan of care section, click on the Add Goal box.
- From the Subjective and Objective Section, there are dynamic G boxes in some of the questions. For the Default Template in the Subjective Section, these dynamic G boxes are provided by the system. But for other templates that are created by the user, users need to indicate during the template creation if a dynamic G box is warranted for that question. To review the lesson on how to add goal boxes on templates, click here.
All goals that are created from the Subjective and Objective section through the floating G boxes will appear below the question in the Subjective and Objective section. But it will also automatically appear in the Goal section in the Plan of care.
Once the Add Goal button from the plan of care or the dynamic G Boxes from the Subjective and Objective section is clicked, it opens the Goal box pop-up.
The system provides users with the ability to save goals as templates. This allows the users to use previous goals that have been saved as a template to other patients making it easier to use and less time-consuming.
When the user ticks on the box indicating Save as Template, the current goal that is on the goal pop-up box will now be a part of the template list that can be used as an option in the future.
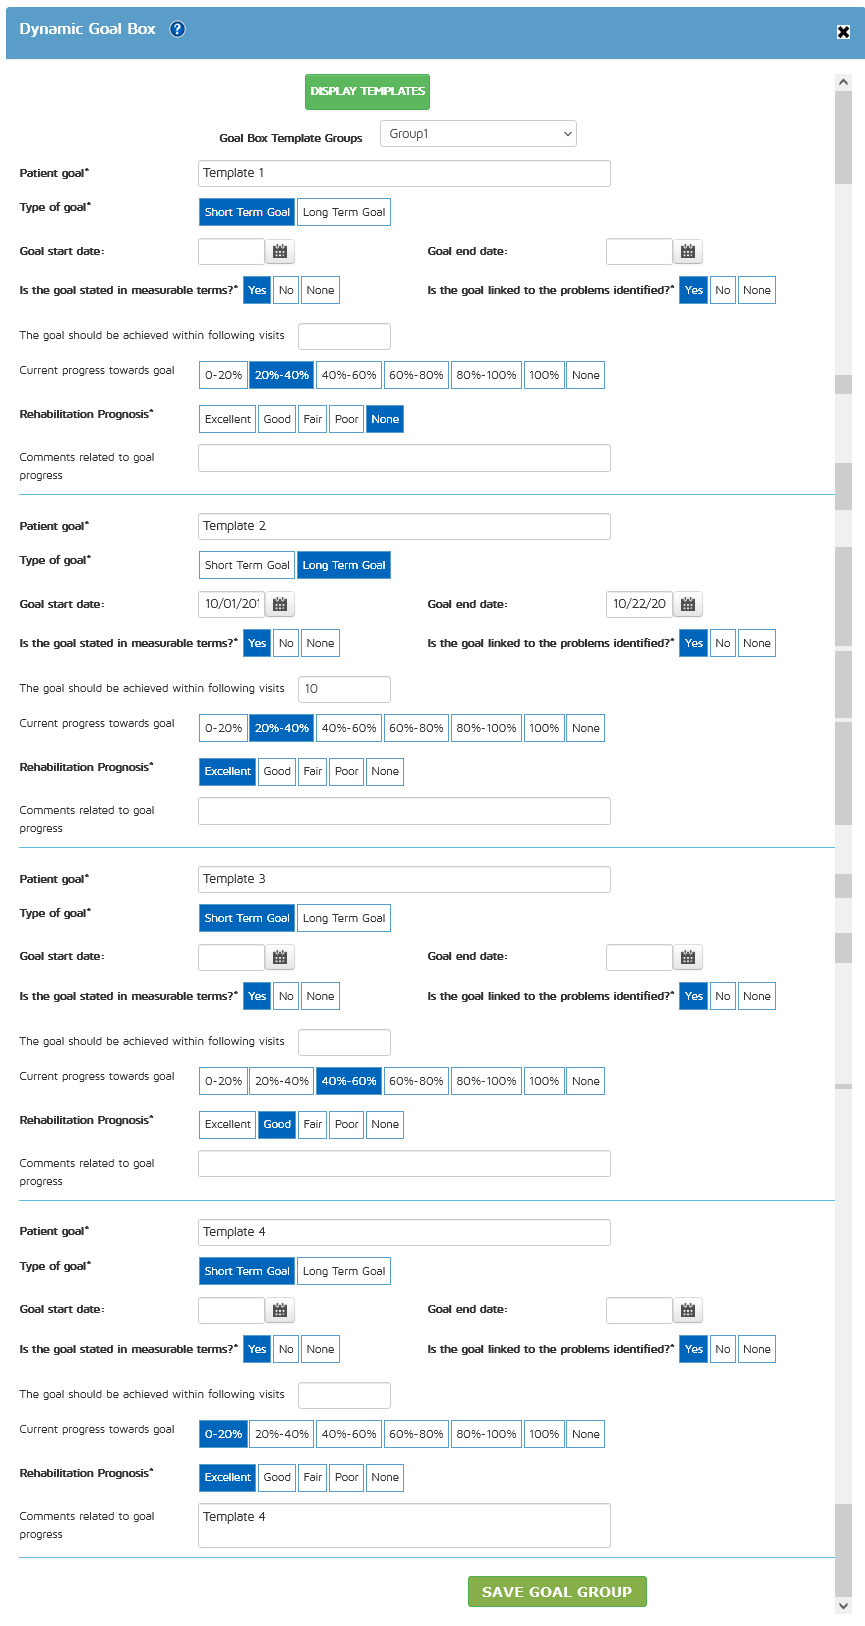
If the user wants to use existing goal templates, click on the Display Templates button
The area will change into a drop-down selection of all goal templates that have been saved. Click on which template you want to use and it will be highlighted in blue.
The information in the template will automatically appear in the goal box information section. The user can still edit the information if needed. Then save the goal. Once the Save button is clicked, a notification in the upper left hand of the screen will notify the user that the goal has been saved successfully. The goal will also appear on the Goal section of the plan of care.
There are 2 ways to save your completed Goals.
1. Save and Add New - this will save your completed goal and lets you add another goal without closing the Goal box pop-up.
2. Save Goal - this will save your completed goal and closes the Goal box pop-up.
In the Goal Box, the mandatory fields are indicated with an asterisk. Highlighted in this screenshot are the mandatory fields. This information is necessary to be compliant.
If the Prepopulate Dynamic Goal Box feature is turned on, the questions "Is the goal stated in measurable terms?" and "Is the goal linked to the problems identified?" will default to YES in all instances of the dynamic goal box throughout In Touch EMR. The rehabilitation prognosis will also default to 'Good'.
This reduces documentation time and helps improve compliance with payor guidelines.
To review the lesson on how to turn the features on and off for users, click here
Once the goals have been added, the goals will appear on the Plan of care section and the system will list all the goals base on which one has been added first.
The users will still have the option to:
- Reorder - These up and down button allows the clinicians to reorder which goals goes first. Most clinicians follow the rules of importance and need in the sequencing.
- Edit - users can still edit the goals
- Delete - user can delete the selected goal
Instruction/ Intervention
To add instructions/interventions to be provided in future visits, click on the Add New button.
A pop-up box will appear that will have a drop-down option of possible topics for what the instructions will be about. Clinicians can choose a topic, enter the start and end time and comments. Click on the Add button to save.
Once an instruction/intervention has been added it will appear on the plan of care page. The users will still have the ability to edit or delete the saved instruction/intervention.
Physician Options
By default, the physician options only have 2 questions
When the "Is the Physician Signature Required?" section has been answered with a YES, the Physician Customization option will appear.
When the Physician Customization is enabled, the physician will have an area to add comments and approve or deny the Plan of care. It will appear on the Plan of Care PDF like so:
If the user answered "Enable" in the Physician Name Display option, the Select Physician drop-down option will appear. If there is a referral resource already associated with the patient chart, that referral resource will be pre-selected.
If the user would like to select a different referral resource or if none was provided by the system, users can choose from the drop-down selection among the referral resources within the system. To review how to add referral resources on the patient chart click here
To review the lesson on how to add to the list of referral resource options, click here.
The Physician signature and Physician Name display will appear on the Plan of Care PDF like so:
When the Auto Physician Signature feature is turned on, the physician signature field within the plan of care section in the initial evaluation, progress note and reevaluation will always default to YES for all patients, all payers.
Please note that this applies to the physician signature fields in the plan of care in the initial evaluation, progress note, and reevaluation, but not the daily note.
To review the lesson on how to turn the features on and off for users, click here
Provider Options
Plan Approval and Review - when enabled, the following text will appear on the plan of care, prior to the signature fields. "I certify that I have examined this patient and treatment is medically necessary. The services will be provided while the patient is under my care. The plan established will be renewed every ninety days or more often, if the patient's condition requires it.". Generally, this should be enabled.
Extended Provider Signature - When a patient is being seen by more than one clinician, this option allows the designation of this additional / extended provider and this additional providers signature will also appear on the plan of care in addition to that of the rendering provider. The additional provider can sometimes be a PTA, COTA or another clinician. Once the YES option is selected, it will provide another question below, for the user to choose among the list of providers which will be the additional signature. Click on the name of the additional provider.
That additional provider will be added as the Servicing provider in the Plan of Care PDF.
Rendering Provider Signature - this is automatically provided. The name of the clinician that the appointment is associated with will appear as the Rendering Provider. But if the user want to change this and indicate a different provider than what is listed, there's a drop-down selection of other providers within the clinic. Only licensed healthcare professionals (PT, OT, Speech and Mental Health Professionals) appear in this list. The signature of the selected rendering provider will appear on the plan of care.
The signatures will appear on the Plan of Care for the rendering provider and the servicing provider like so:
At the end of the page, there are options to save, generate and PDF.
- Save as Draft - This will save all the entries and changes to the Plan of Care
- Generate Plan of Care - when clicked, a blue confirmation box at the top left-hand corner of the screen will appear. This notifies the users that the Plan of care has been generated successfully.
When a Plan of care has been generated, it will now appear on the Patient Dashboard under the Plan of Care section. This makes it easy for users to fax the Plan of care by itself without the actual document. This generated plan of care can be printed or faxed electronically to referring physicians. This is ideal for referring physicians, who may want to see the plan of care only, instead of the entire clinical record.
When the Auto-Generate POC feature is turned on the finalization of any / all of the following note types - Initial Evaluation, Progress Note and Re-evaluation will automatically generate a POC for that patient, even if the 'Generate Plan of Care' button is not clicked.
To review the lesson on how to turn the features on and off for users, click here
However, it is important to note that the 'save draft' button must be clicked before the document is finalized. This will make sure that the latest version of the plan of care is automatically generated for that document type.
- PDF icon - when clicked, this will open a new tab showing the user the contents of the Plan of Care PDF as how it would be once it is printed or fax.
Additional features
When the Mandatory Plan Components feature is turn on In Touch EMR will require ALL of the following components to be on the plan of care, before allowing the user to finalize the document.
1. Frequency and Duration
2. Certification Period
3. Procedures (a minimum of one procedure or modality)
4. Goals (a minimum of one goal)
The user must get into the habit of clicking 'Save Draft' to save data in the plan of care. If the user clicks on 'Save Draft', and any components are missing, then the user will see the appropriate error message on the plan of care page (Frequency and Duration missing, Certification Period missing, Minimum of one procedure missing, Minimum of one goal missing). The user must enter the missing data and then 'save draft' again until the system prompts that the Plan of Care has been successfully saved.
If the user ignores the error messages or If the user ignores the plan section entirely / forgets to click the "save draft' button and proceed to finalize the document an error message will appear when the 'Save billing' button is clicked (Please enter missing components in the plan of care).
To review the lesson on how to turn the features on and off for users, click here When turning on this feature, it will require that the user indicates which type of document will the feature be turned on for.
We have created a group template feature in the Plan of Care that allows users to use multiple templates at the same time.
Adding templates to a Group
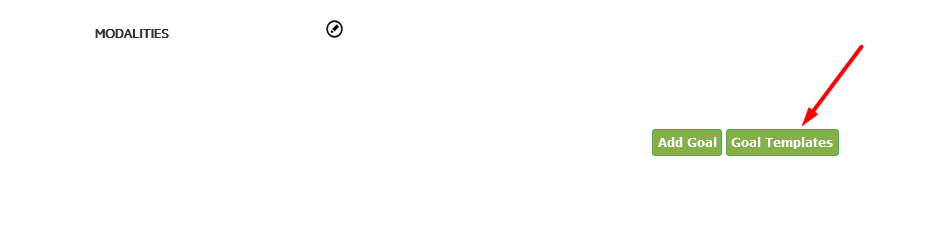
To add a template to your Group, click on Goal Templates.
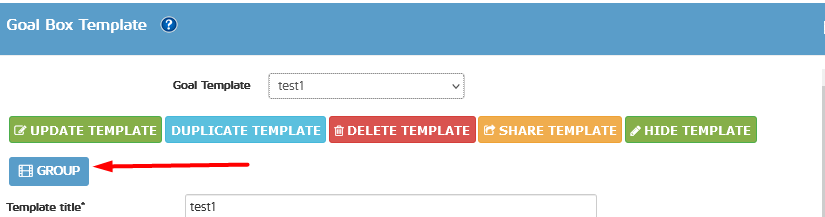
Select your Template then click on Group.
You can then choose to add it to an existing Group or create a new Group.
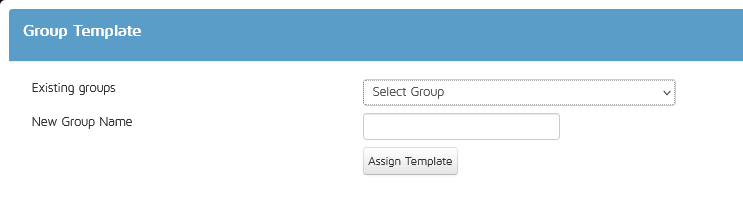
Removing templates from a Group
From this pop up, you can also remove the template from its current Group.
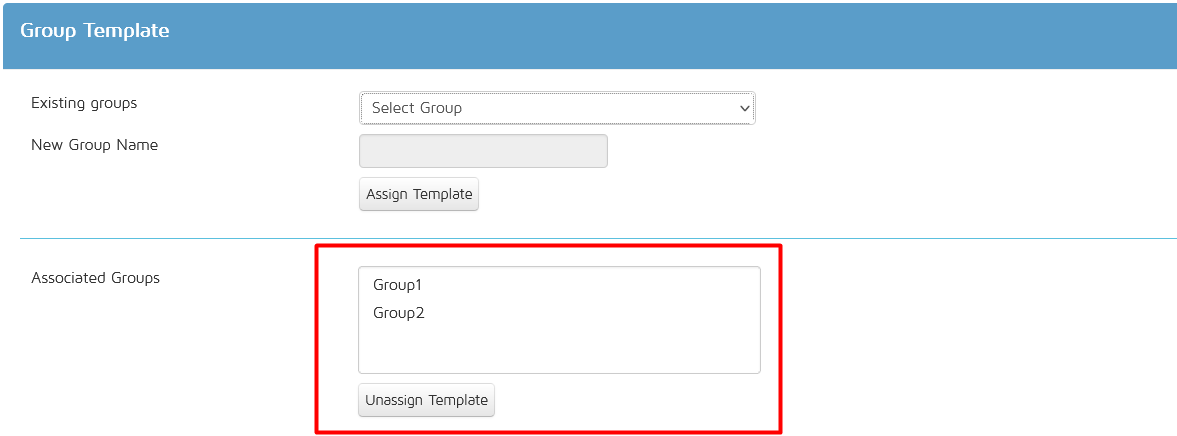
Just select the Group you want to remove your template from, then click on unassign Template.
Selecting Group Templates
Click the Add Goal button

Users have the option to select Single templates or Group templates

If the Group Template option is selected, it will ask the user to select which Group template to use.

Once a Group is selected, all Templates included in your Group Templates will be shown and will be added to your Plan of Care.
Users will still have the ability to edit the templates prior to saving the POC.